
Upgrading VMware Integrated OpenStack
In a previous article I showed the process to patch an existing VIO 1.0 installation, which as you were able to see it is a clean and easy process. VMware announced VMware Integrated OpenStack 2.0 during VMware US and it finally became GA a few weeks ago.
This new version of VIO has all OpenStack code updated up to the latest Kilo release and comes packaged with many interesting features like Load-Balancing-as-a-Service (LBaaS) or auto-scaling capabilities based on Heat and Ceilometer.
With a new VIO version hot of the press it is time now to upgrade your VIO 1.0.x environment to 2.0 and take advantage of all those new great goodies. The upgrade process is pretty straightforward and consist of three main stages.
- Upgrade VIO Management Server
- Deploy a new VIO 2.0 environment
- Perform the data migration
Keep in mind that you will need to have enough hardware resources in your management cluster to be able to host two full fledged VIO installations at the same time during the migration process. Just for the sake of transparency, the lab environment where I test the upgrade is based on vSphere 5.5 Update 2, NSX for vSphere 6.1.4 and VIO 1.0.2.
Step 1 - Upgrade VIO Management Server
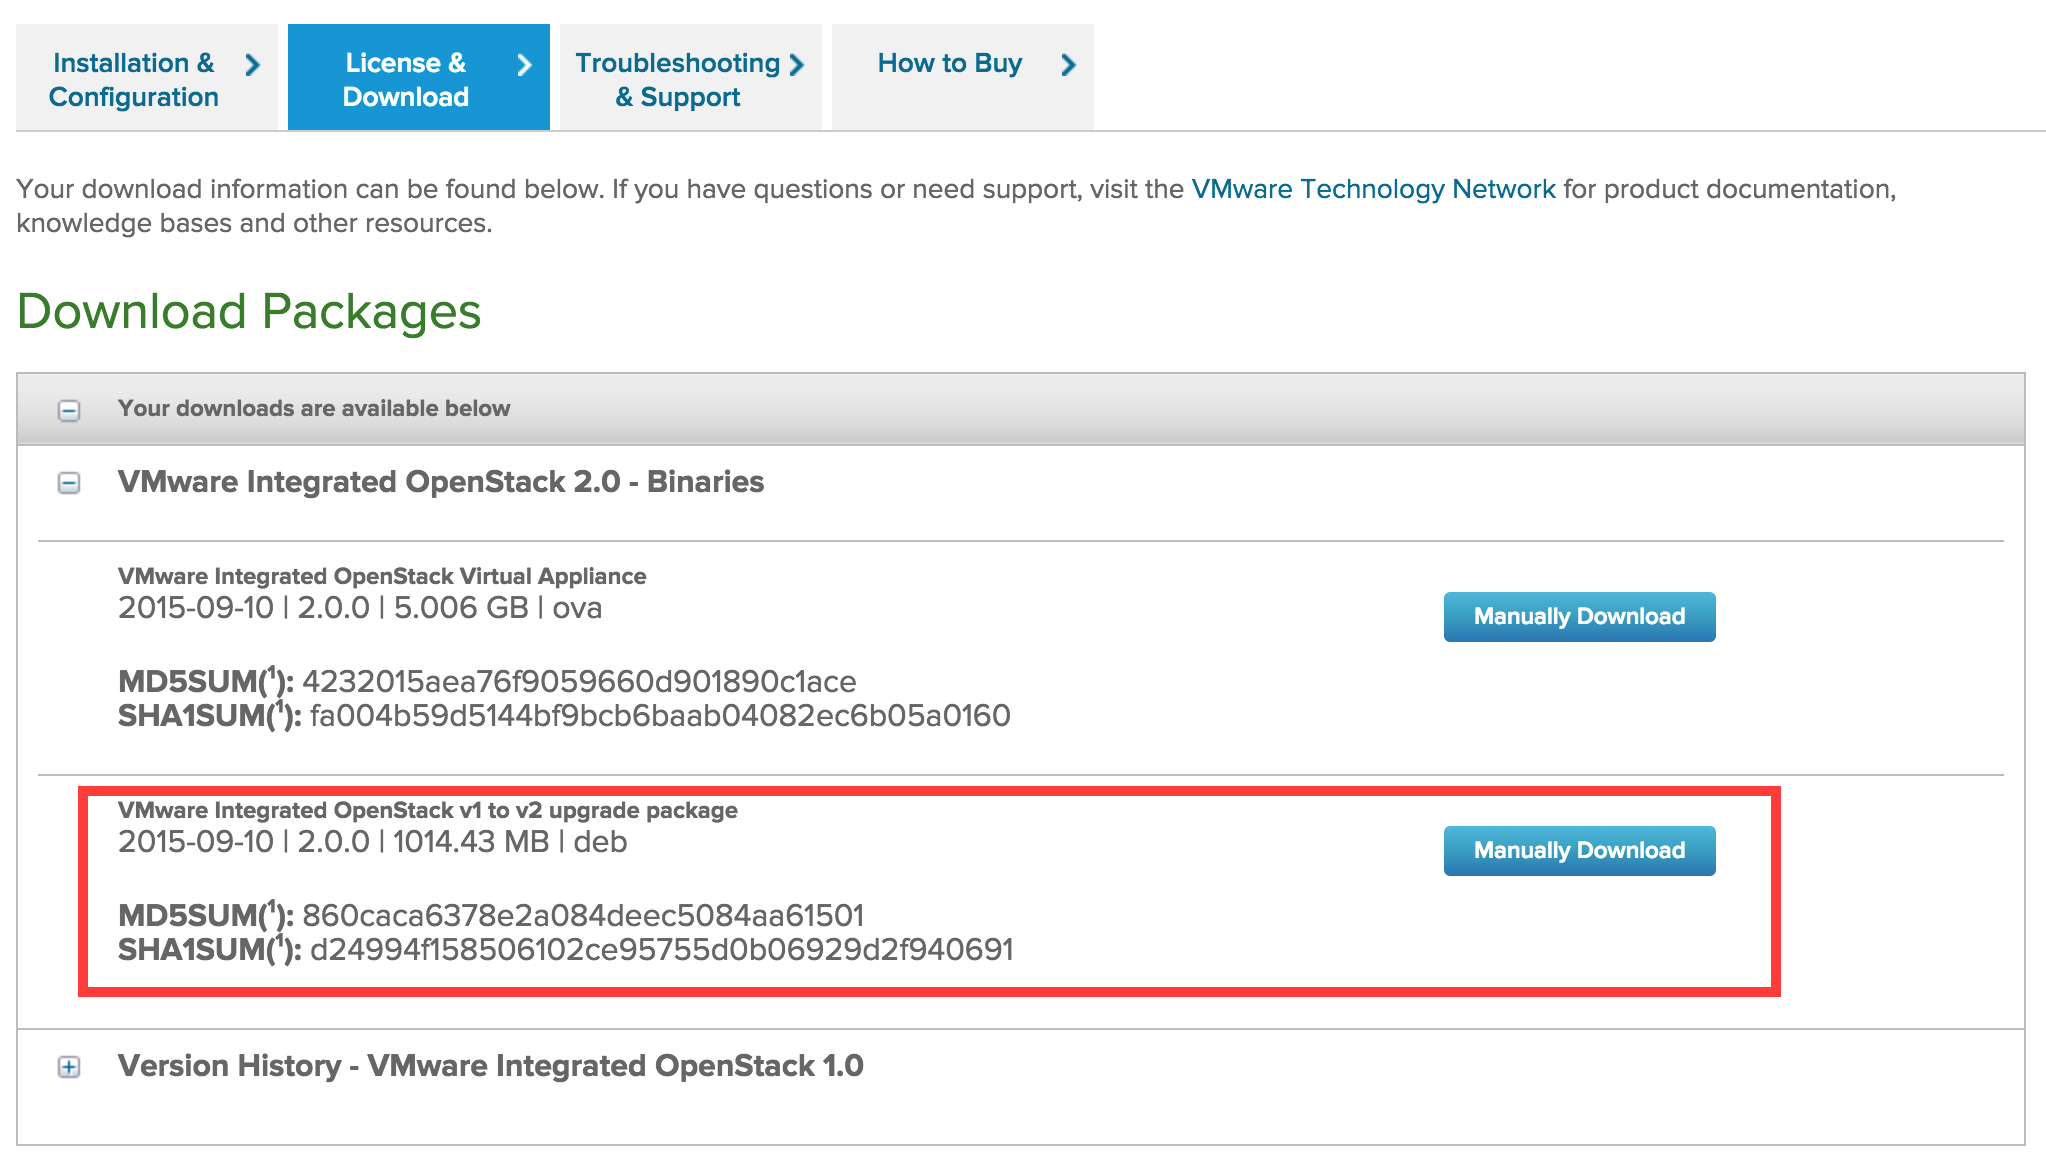
From VMware website download the .deb upgrade package and upload it to
VIO Management Server.
Stage the upgrade package.
viouser@vio-oms:~$ sudo viopatch add -l vio-1.0-upgrade_2.0.0.3037964_all.deb
[sudo] password for viouser:
vio-1.0-upgrade_2.0.0.3037964_all.deb patch has been added.
viouser@vio-oms:~$ viopatch list
Name            Version       Type   Installed
--------------- ------------- ------ -----------
vio-1.0-upgrade 2.0.0.3037964 infra  No
vio-patch-2     1.0.2.2813500 infra  Yes

viouser@vio-oms:~$
Upgrade the management server with viopatch command.
viouser@vio-oms:~$ sudo viopatch install -p vio-1.0-upgrade -v 2.0.0.3037964
Installing patch vio-1.0-upgrade version 2.0.0.3037964
done
Installation complete for patch vio-1.0-upgrade version 2.0.0.3037964
viouser@vio-oms:~$
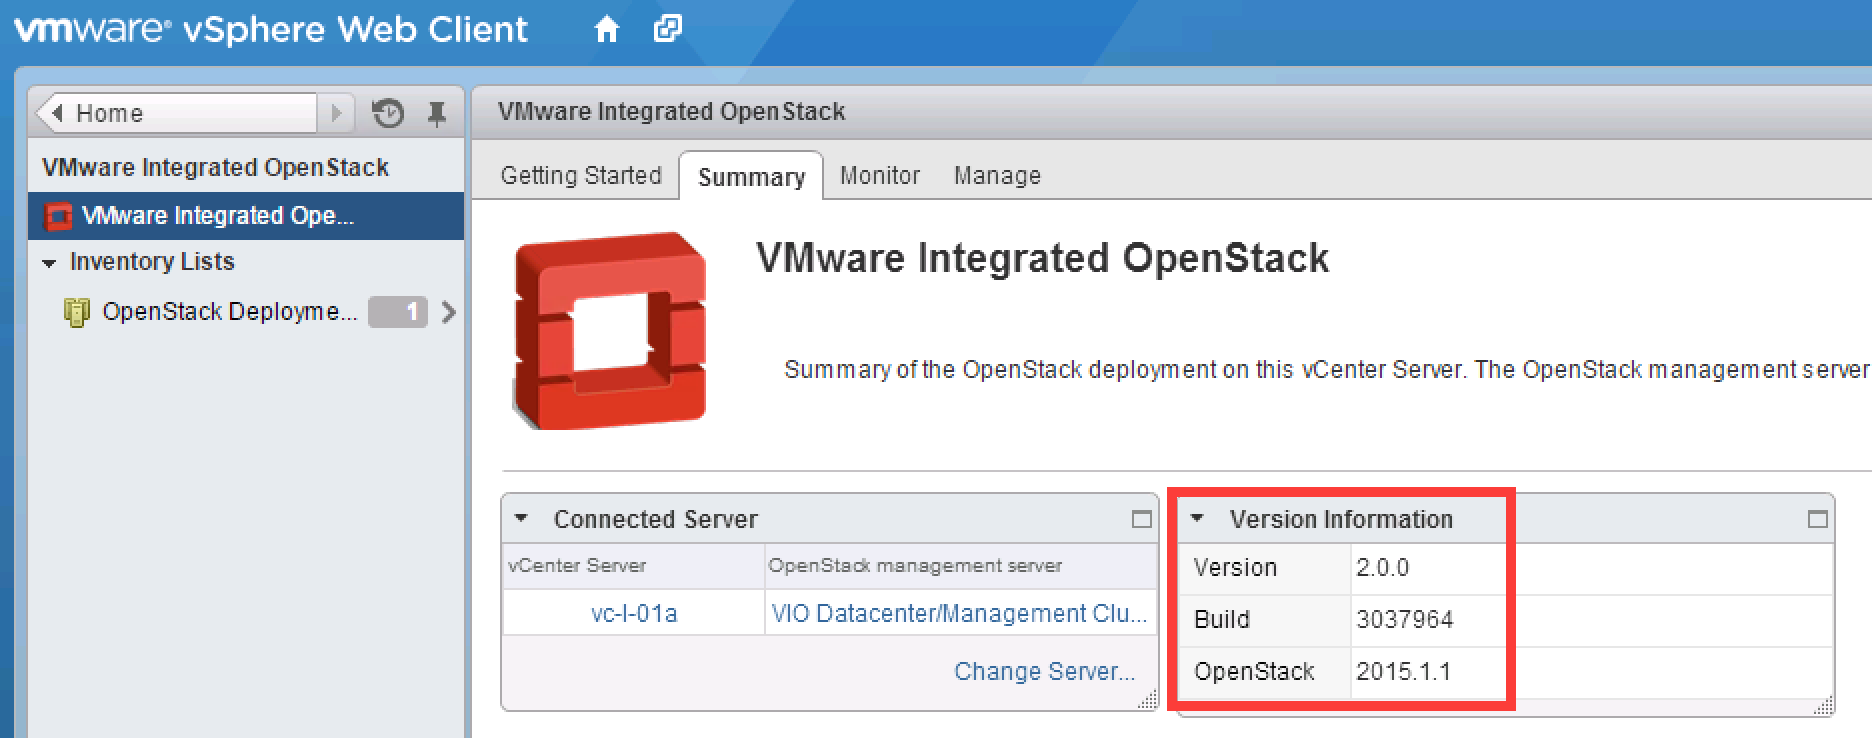
Go to the vSphere Web Client, logout and log back in to verify that the new version is correct.
Step 2 - Deploy a new VIO 2.0 environment
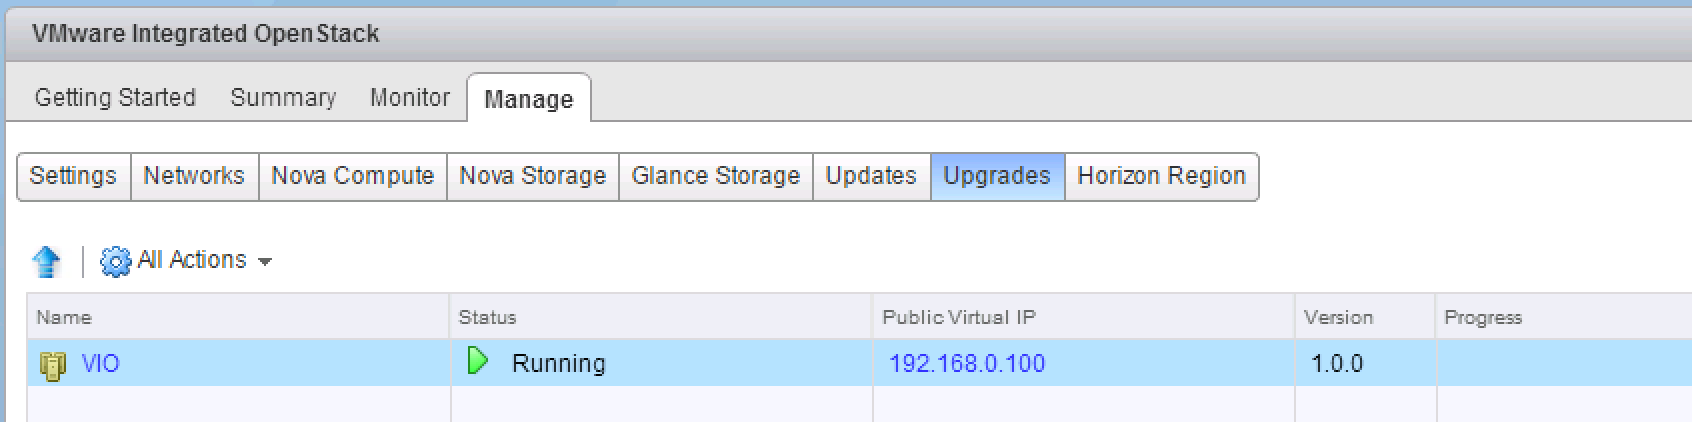
With VIO Management Server upgraded is now time to deploy a fresh 2.0 environment. In the VIO plugin go to Manage section and a new Upgrades tab will be there. Before
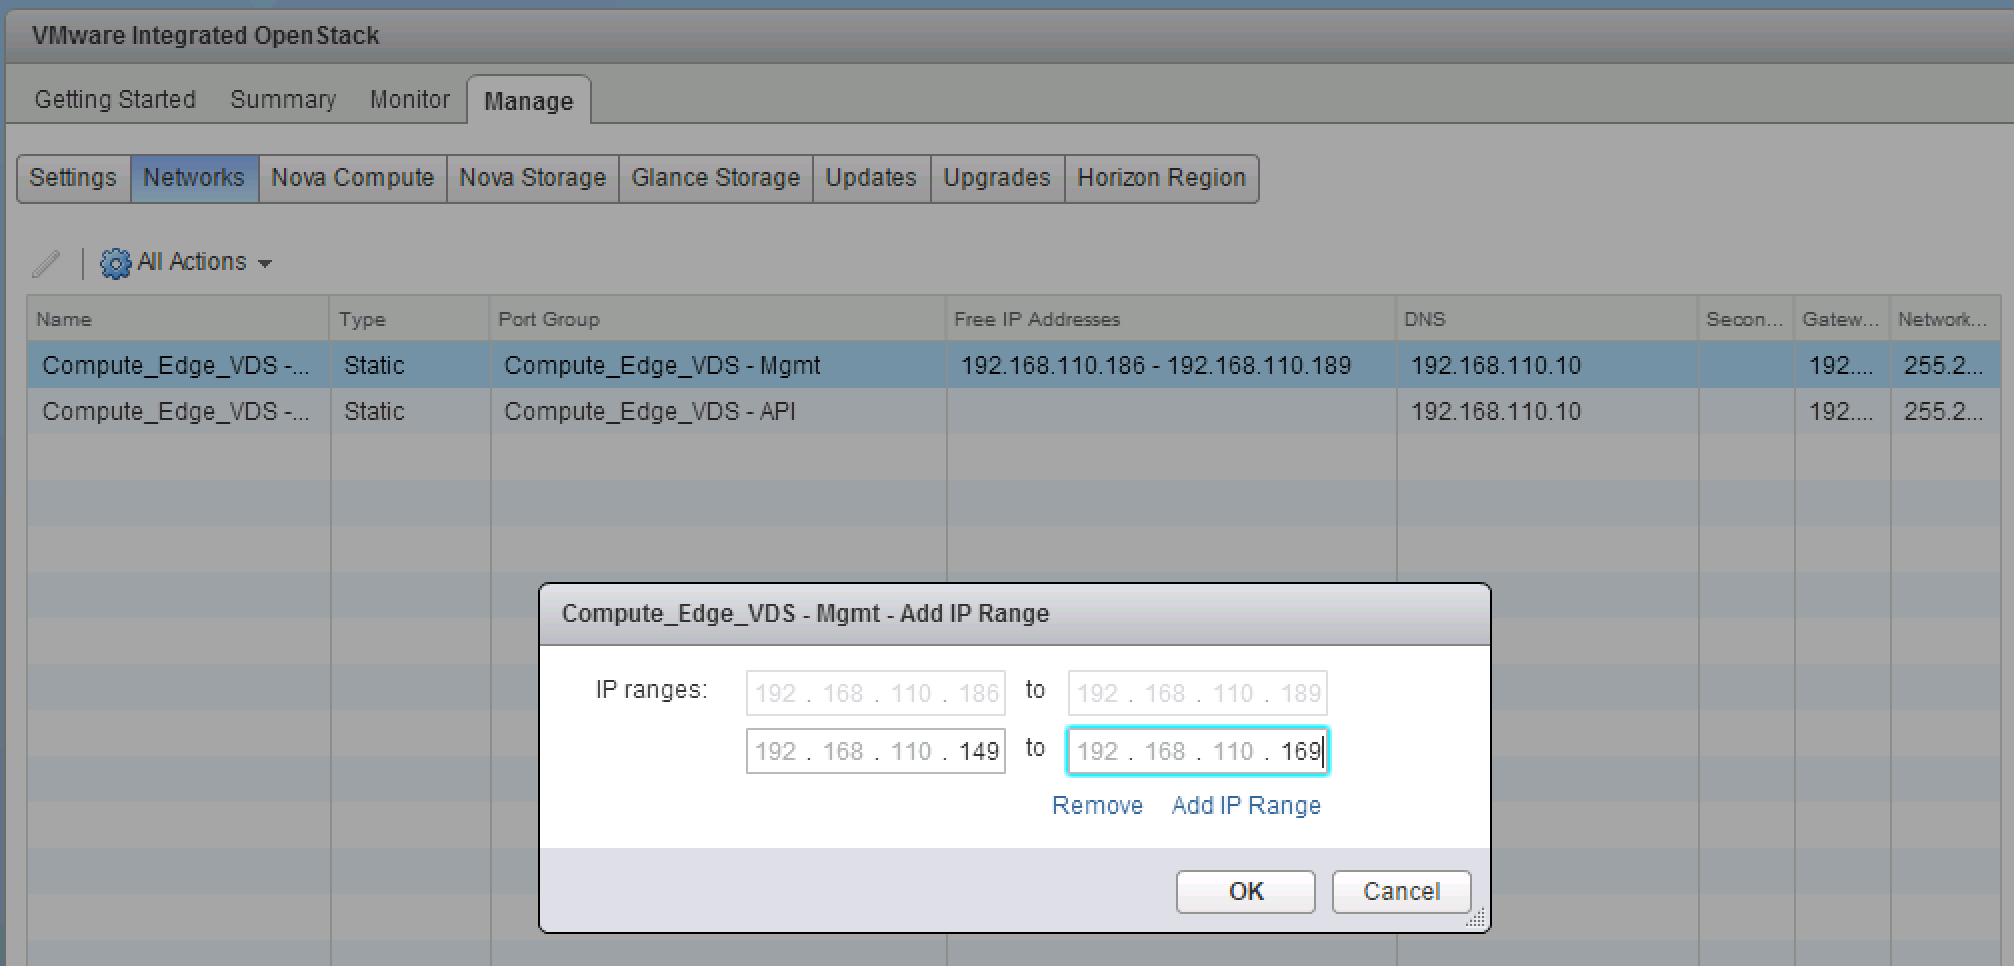
Before starting with the deployment check in the Networks tab that there are enough free IP address for the new deployment, if there aren’t then add a new IP range.
Click on the Upgrade icon. Select if you want to participate in the Customer experience improvement program, my recommendation here is to say yes to help our engineering team to improve VIO upgrade experience even more ;-), and enter the name for the new deployment.
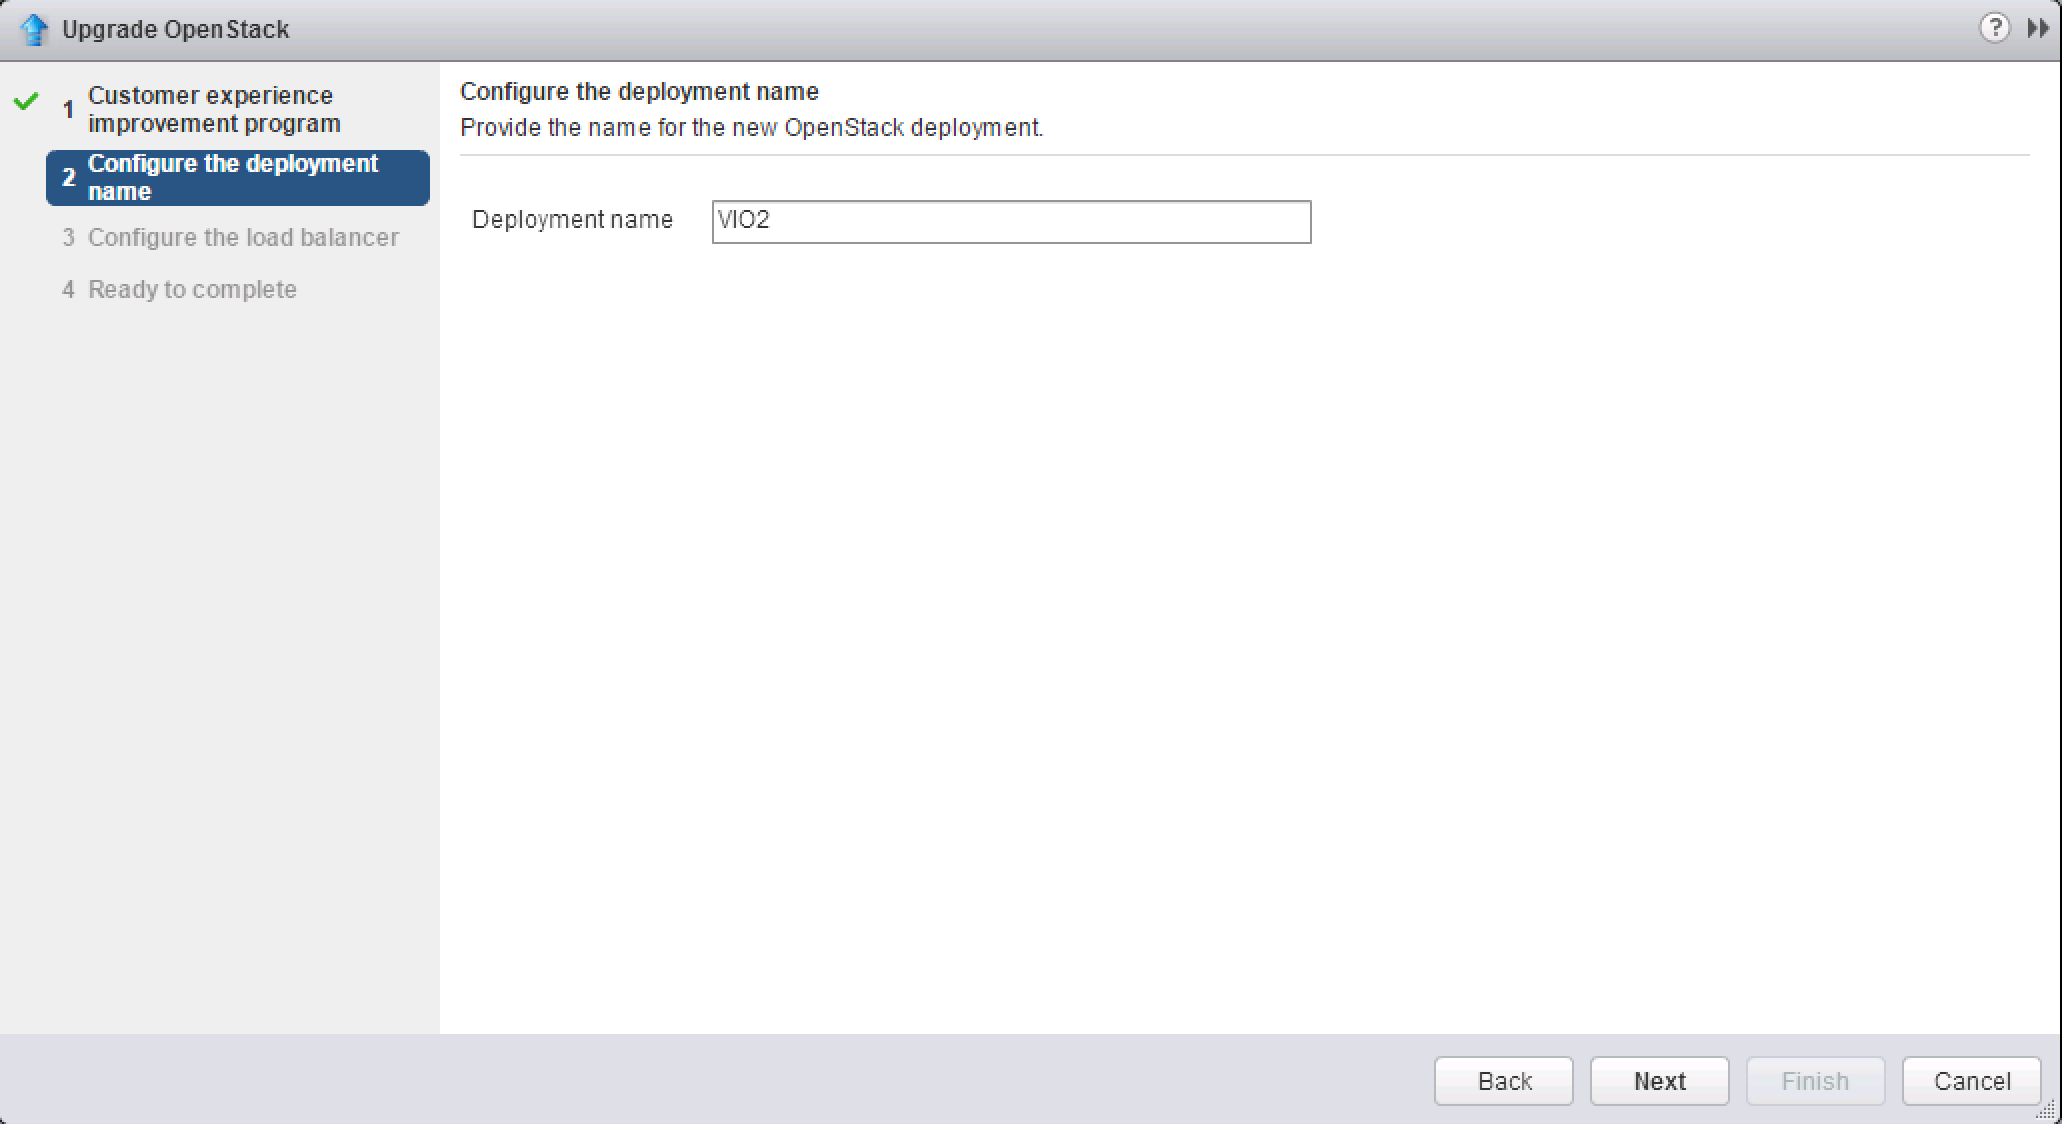
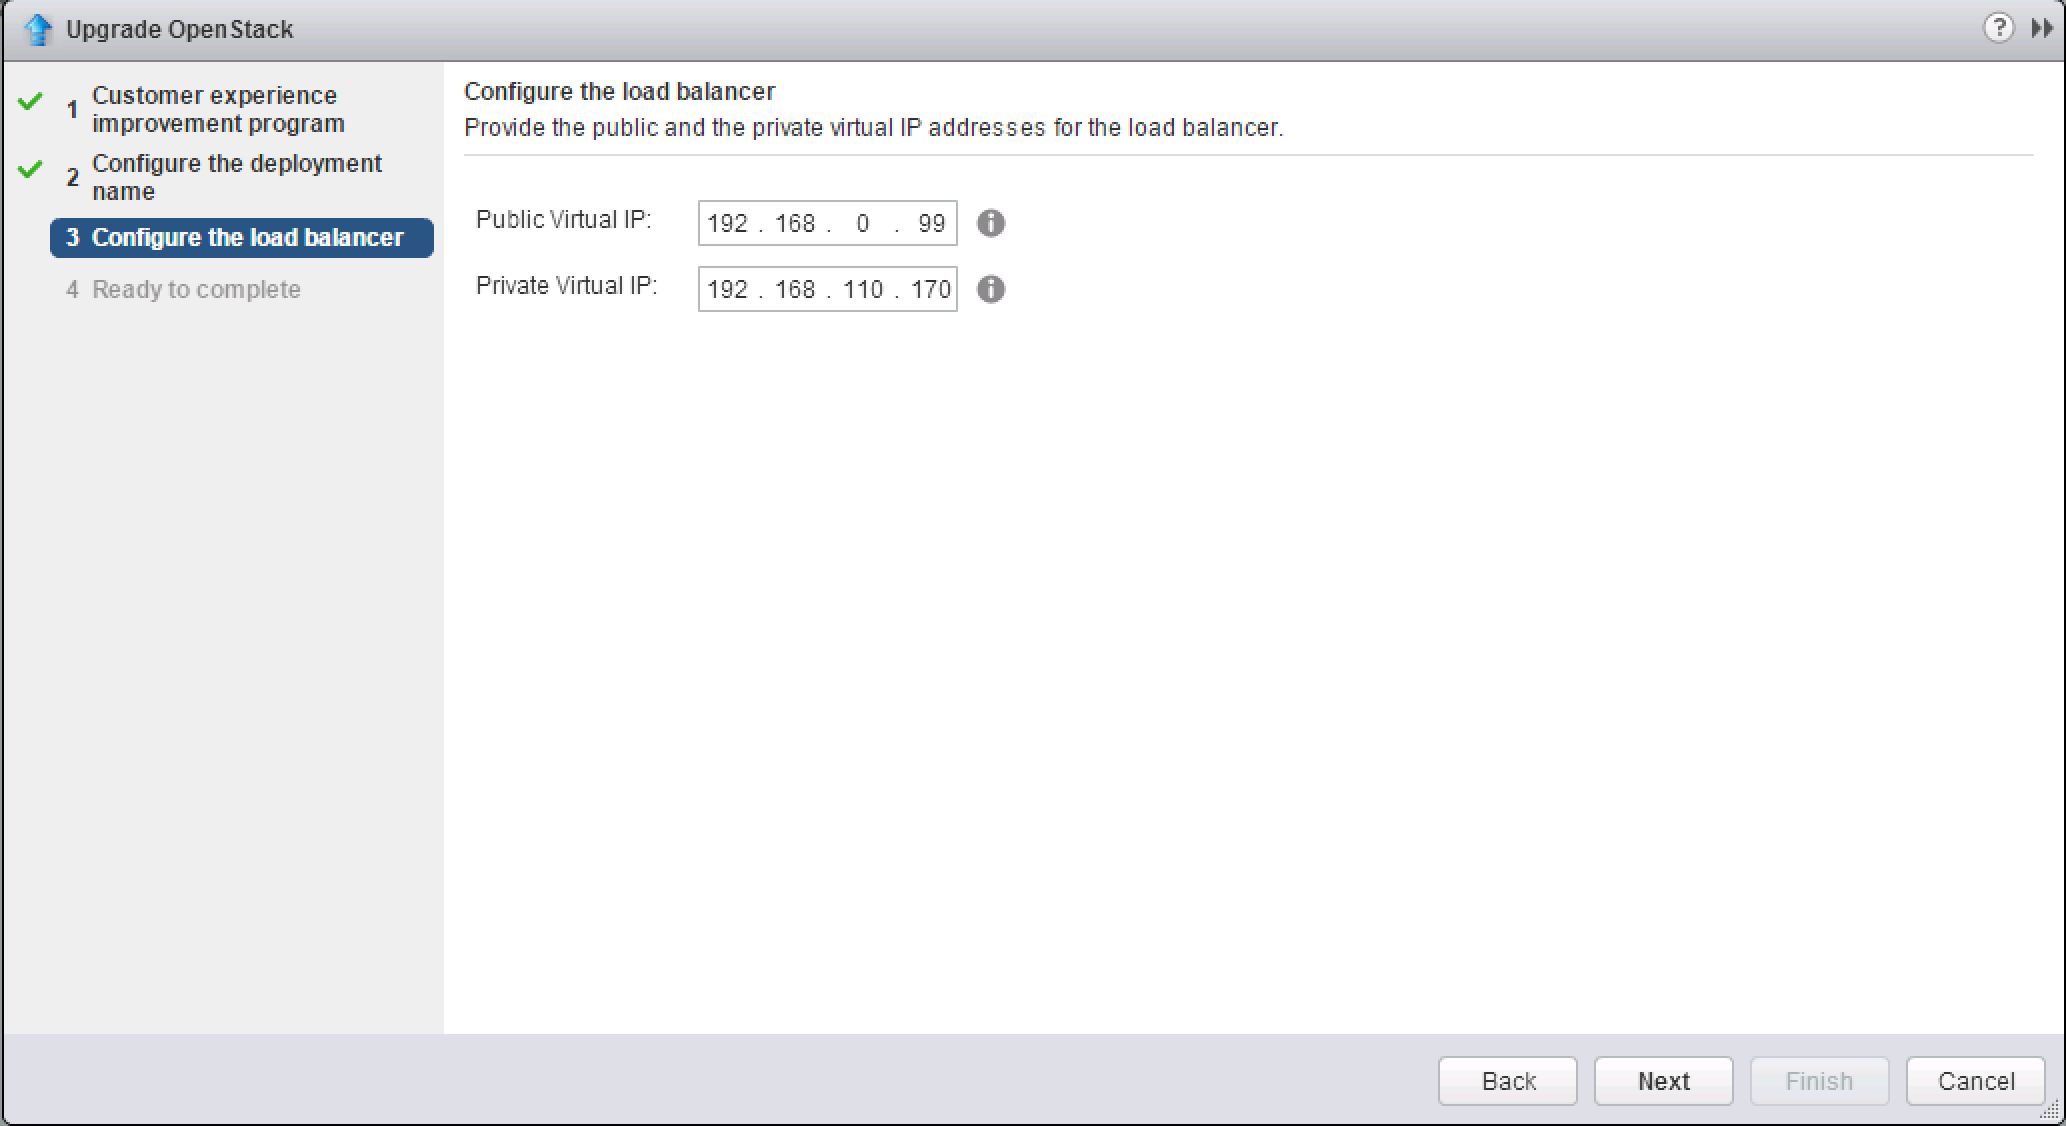
Enter the IP addresses for the public and private load balanced IP addresses, keep in mind that these IP addresses must belong to the API subnet of the existing VIO 1.0 environment in case of the public and to the management network segment in the case of the private one.
In the last screen review the configured values and click Finish. The new environment will be deployed and you will be able to monitor it from the Upgrades tab.

Step 3 - Migrate the data
With the new environment up and ready we can start the data migration. From the Upgrades tab right-click in the your existing VIO 1.0 installation and select Migrate Data.
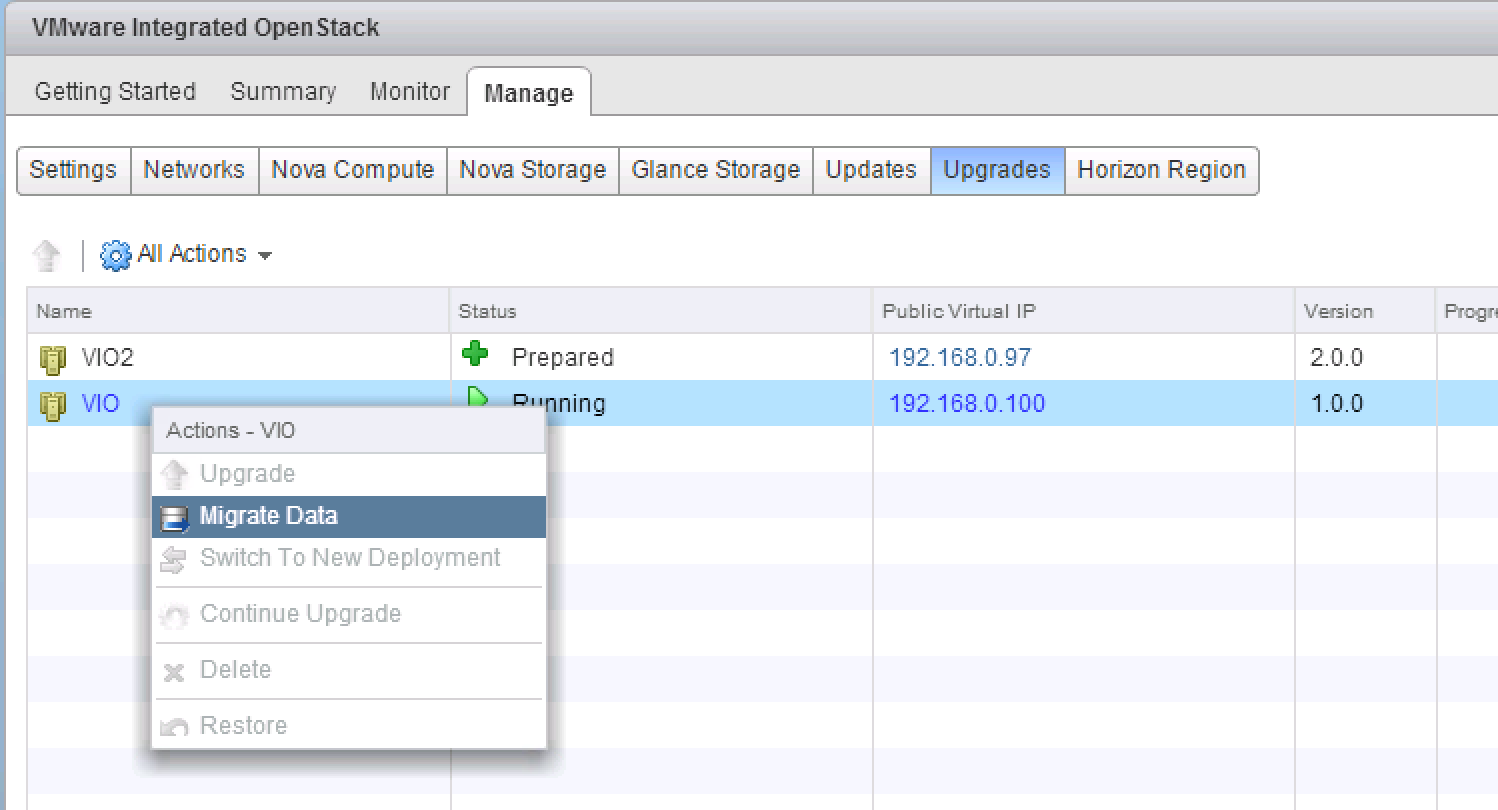
The migration wizard will ask for confirmation, click OK. During the data migration all OpenStack service will be unavailable.
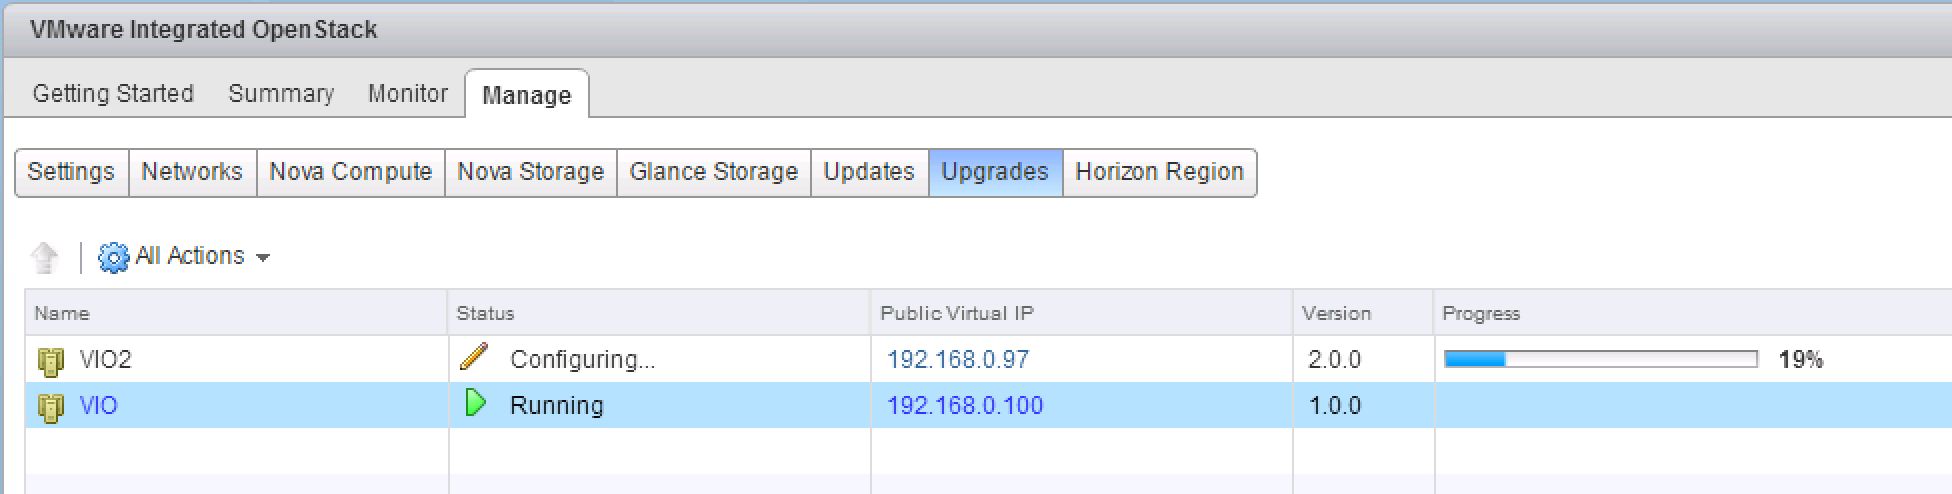
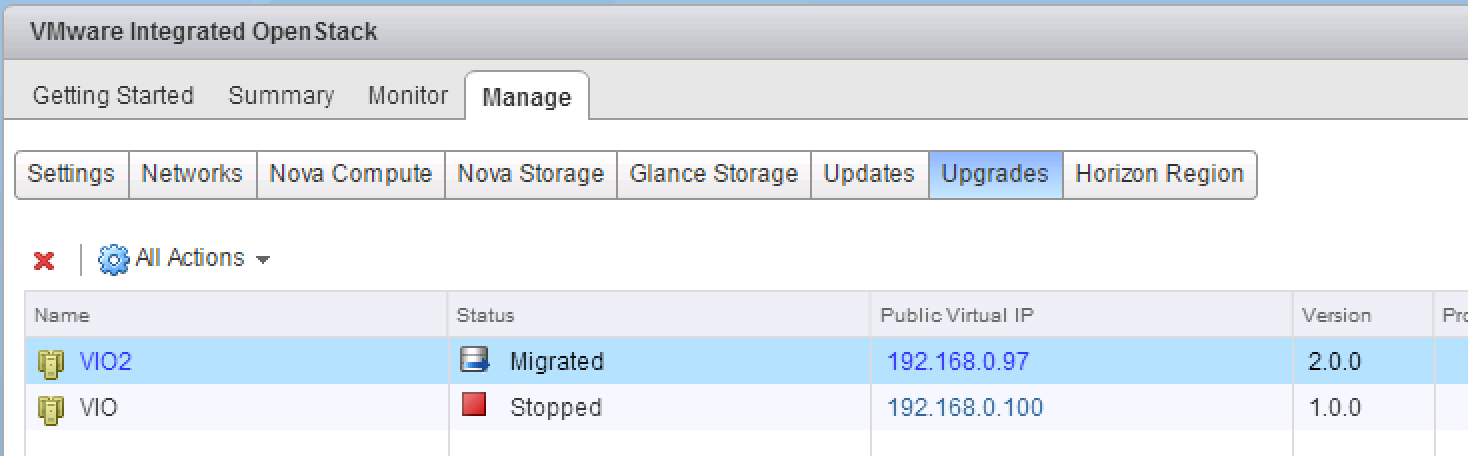
When the migration process is finished the status of the new VIO 2.0 environment will appear as Migrated and the previous VIO 1.0 will appear as Stopped.
Open a browser and connect the VIO 2.0 public IP to access OpenStack Horizon interface, login and verify that all your workloads, networks, image, etc have been properly migrated. Logout from Horizon and go back to the Web Client. Now that the data has been migrated we need to migrate the original Public Virtual IP to the new environment.
Right-click on VIO 1.0 deployment and from the menu select Switch To New Deployment.
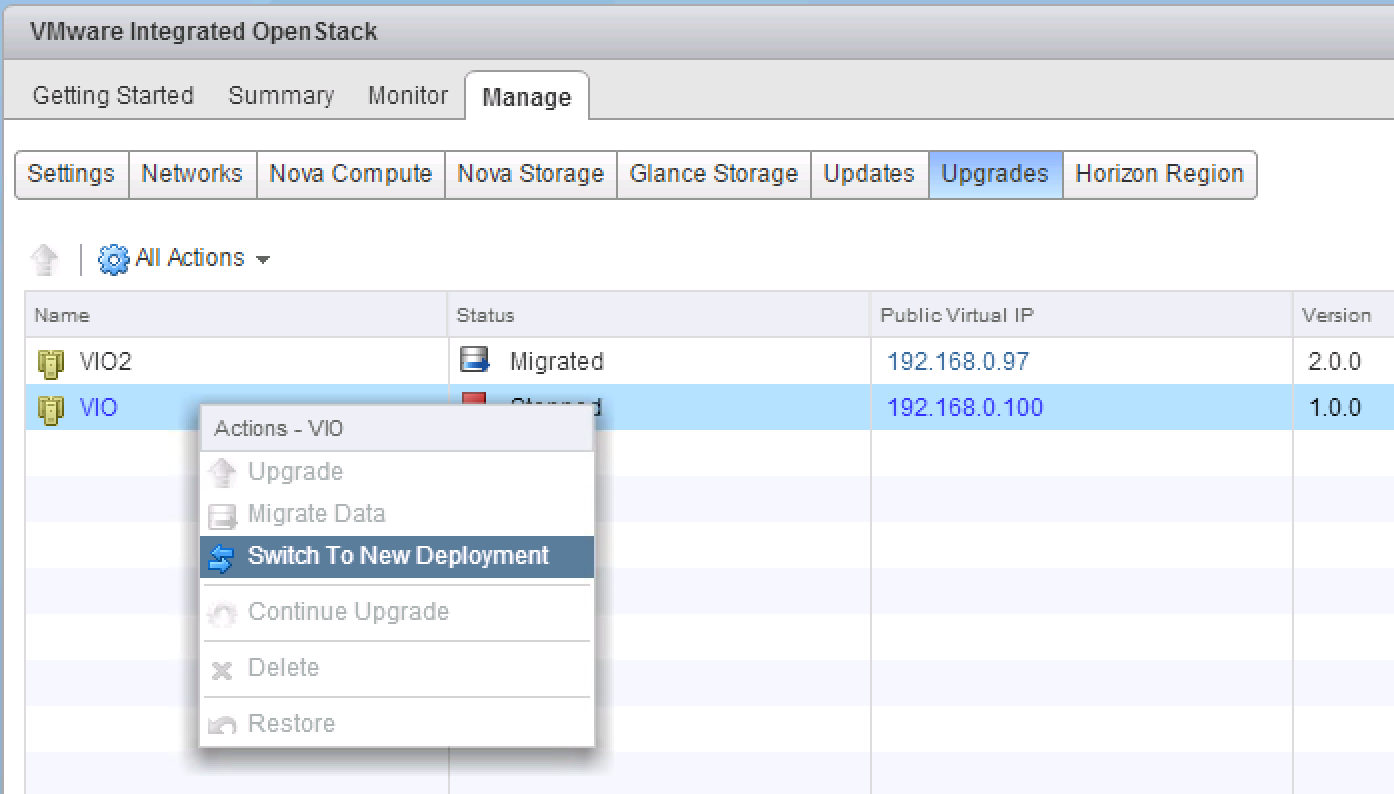
A new pop-up will appear asking for confirmation since again the OpenStack service will be unavailable during the IP reconfiguration.
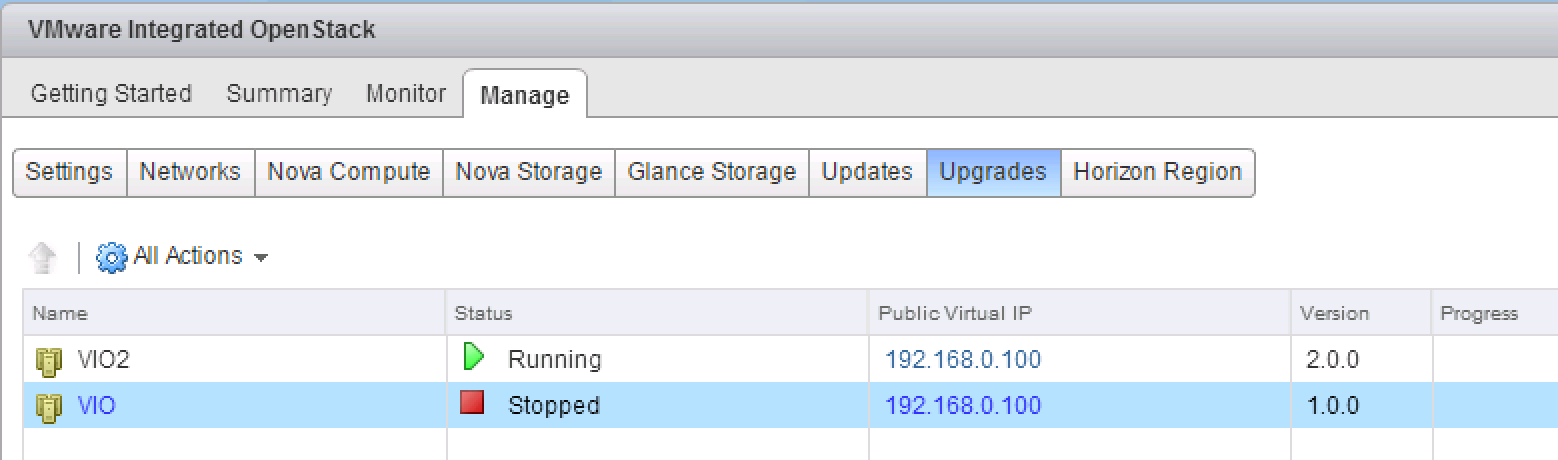
After the reconfiguration the new VIO 2.0 deployment will be in Running status and the Public Virtual IP will be the same as the former 1.0 deployment.
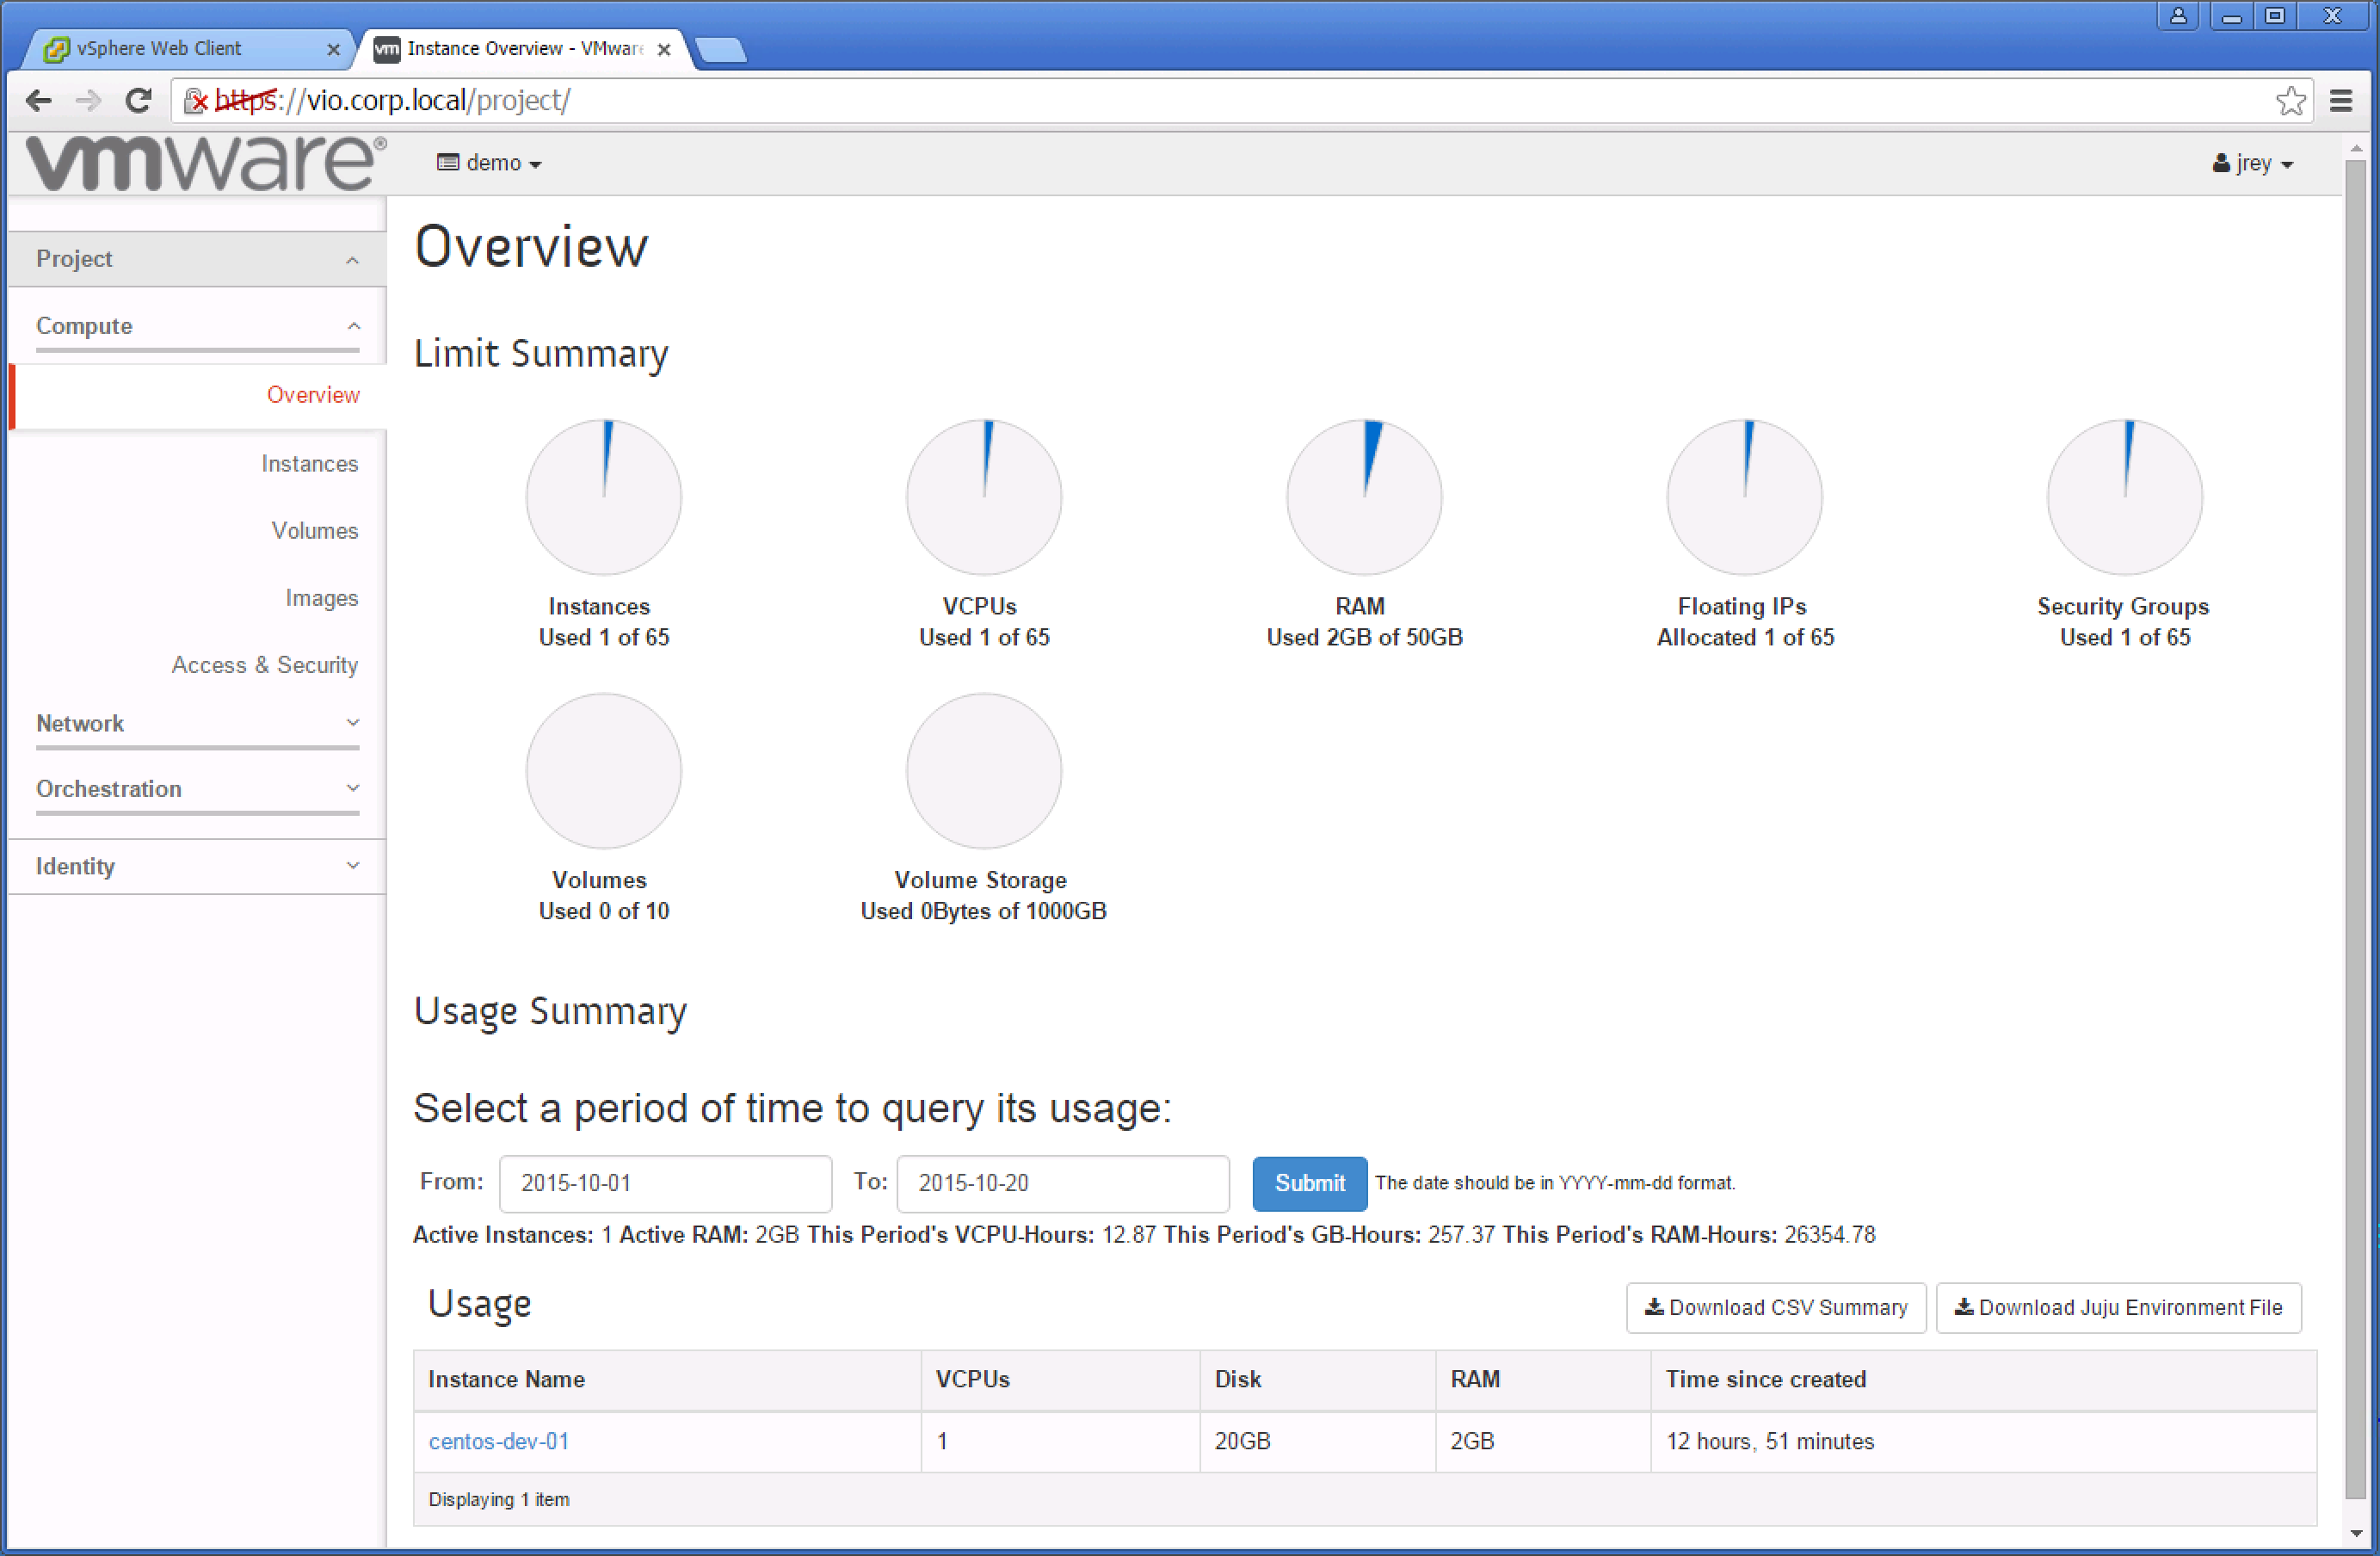
The upgrading procedure is finished. We can now access now Horizon using the existing FQDN, verify that everything is still working and enjoy your new OpenStack Kilo environment.
In the same way as patching, with VIO upgrading your OpenStack cloud does not have to be a painful experience, VIO provides the best OpenStack experience in a vSphere environment. Kudos to my colleagues of the Team OpenStack @ VMware.
Happy Stacking!
Juanma.
Comments